


How to Change a Fluorescent Light Bulb|Step-by-step Guide
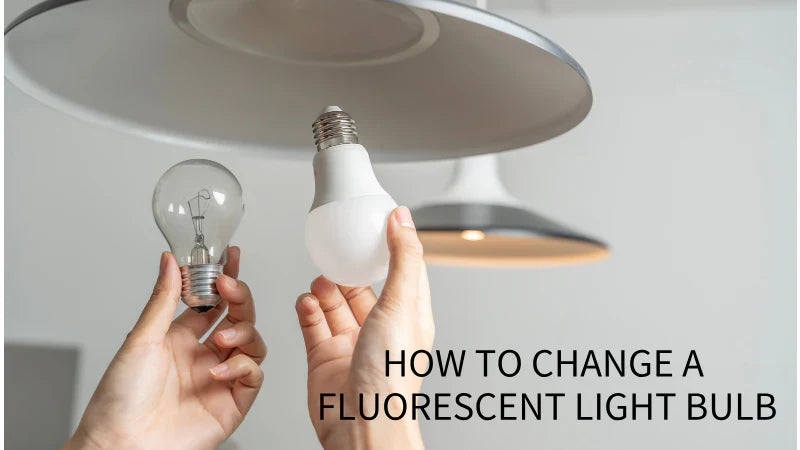

Fluorescent light bulbs are commonly used in homes and offices due to their energy efficiency and extended lifespan. But in order to maintain adequate lighting, you have to replace them promptly when they start to flicker or burn out. In this article, we'll guide you through how to change a fluorescent light bulb step by step, ensuring a safe and straightforward replacement.
Part 1. Introduction to Replacing Fluorescent Light Bulbs
Whether you're using a standard fluorescent tube or a compact fluorescent bulb, the process of changing a fluorescent light bulb follows similar steps. With the right tools and safety measures, you can easily replace a burnt-out bulb and restore illumination to your space.
Part 2. Tools and Materials Needed for Changing Fluorescent Light Bulbs
Before you begin, gather the following tools and materials:
- Step ladder or stool (if needed)
- Replacement fluorescent light bulb
- Protective gloves (optional)
- Safety glasses (optional)
Part 3. Preparations before Fluorescent Light Replacement
Make sure the power to the fixture is turned off at the circuit breaker or fuse box before replacing the fluorescent light bulb. By taking this precaution, the risk of electric shock during the replacement process is reduced. In order to prevent burns, make sure the existing bulb has cooled down completely before handling it.
Part 4. How to Replace Fluorescent Tube Light Bulb in 6 Steps
To safely and efficiently replace a fluorescent light bulb, there are six steps:

Step 1. Turn Off the Power
Locate the circuit breaker or fuse box and switch off the power to the light fixture where the fluorescent bulb will be replaced. Turn the light switch on and off to make sure the electricity is completely shut off.
Step 2. Remove the Light Cover
Depending on the type of fixture, the light cover may be secured with screws, clips, or hinges. Use a screwdriver or other tools to loosen the screws or release the clips, then carefully remove the light cover from the fixture.
Step 3. Remove the Old Bulb
Gently twist the old fluorescent bulb counterclockwise to release it from the socket. If the bulb is held in place by spring-loaded pins, depress the pins while twisting the bulb to remove it.
Step 4. Install the New Bulb
Insert the new fluorescent bulb into the socket, aligning the pins or prongs with the corresponding slots or sockets in the fixture. Rotate the bulb clockwise until it locks securely in place.
Step 5. Secure the Light Cover
Once the new bulb is installed, reattach the light cover to the fixture using the screws, clips, or hinges. Ensure that the cover is properly seated and secure to prevent it from falling off.
Step 6. Turn on the Power and Test the Bulb
Restore power to the light fixture by flipping the circuit breaker or fuse switch back on. Turn on the light switch to verify that the new fluorescent bulb is functioning correctly. If the bulb illuminates without flickering or dimming, then you can start to enjoy the new light.
Troubleshooting of Fluorescent Light Not Working After Changing Bulbs
If your fluorescent light is not working after you’ve changed the bulb, here are some troubleshooting steps to help youn resolve the issue:

1. Check the Bulb Installation
Double-check that the new bulb is properly installed. Fluorescent bulbs have pins that must align correctly in the socket.
2. Verify the Bulb Type
Make sure the replacement bulb is the correct type for the fixture. If the new bulb is incompatible, it might not function correctly.
3. Examine the Ballast
Faulty Ballast: The ballast regulates the electrical current to the bulb. If the ballast is faulty, the light may not work even if the bulb is new. You can listen for a buzzing sound from the ballast, or if the ballast is hot to the touch, it may need replacing.
Check for Burnt or Broken Ballast: A visual inspection can also help you identify any burnt areas or signs of damage on the ballast.
4. Inspect the Fixture
Loose Wiring: Check for any loose connections in the fixture that could be preventing the flow of electricity.
Corroded or Dirty Contacts: Clean any contacts or connectors in the fixture to ensure they are free of dust or corrosion.
5.Test the Power Supply
Circuit Breaker: Ensure the circuit breaker hasn't tripped, cutting off power to the fixture. If the breaker has been tripped, reset it.
Fuse: If the light fixture has a fuse, make sure it hasn't blown. Replacing a blown fuse might solve the issue.
6. Test with a Known Working Bulb
If you have another working fluorescent bulb, try replacing the bulb again to rule out a defective new bulb.
7. Check for Voltage Issues
If you have a multimeter, measure the voltage at the socket. The absence of voltage indicates an electrical issue such as a faulty wire, switch, or ballast.
FAQs about Removing Fluorescent Bulbs
Q1. How to Remove a Broken Compact Fluorescent Bulb?
If a compact fluorescent bulb breaks, gather the broken parts carefully and dispose of them in a sealed plastic bag with gloves. Avoid vacuuming or sweeping the area to prevent spreading mercury vapor. Ventilate the room and follow proper cleanup procedures recommended by local authorities.
Q2. How to Change the 2-PIN Fluorescent Light Bulb?
Use the procedures described in this article to change a 2-PIN fluorescent light bulb, paying attention to the alignment of the pins with the sockets in the fixture. To remove the old bulb and to firmly install the new one, twist it counterclockwise and clockwise, respectively.
Q3. How to Change a Fluorescent Bulb to LED?
To change a fluorescent bulb to an LED, ensure that the LED replacement bulb is compatible with the existing fixture and ballast. While some LED bulbs can be installed directly, others might need to have the ballast removed or bypassed. For information on which LED bulbs are compatible with which fixtures, go to the manufacturer's instructions.
Conclusion
Changing a fluorescent light bulb is a simple task that can be accomplished with minimal tools and effort. By following the steps outlined in this guide and taking appropriate safety precautions, you can maintain a well-lit and comfortable space in your home or office.
If you want to change fluorescent bulb to LED light bulbs, Govee Smart Light Bulbs can be the best choice for you. It can adjust the lighting with 16 million color options and tunable warm white to cool white lighting (2,700K to 6,500K), making it perfect for brightening up your kitchen, hallway, bedroom, or living room for any occasion.
